How to Capture Dramatic Desert Photography: Wide-Angle
There is something so special about desert photography. The vastness and sense of adventure are unlike anything else. Many times I stick to the telephoto lens to capture details, but this time I wanted to switch things up. On this Arizona photography trip, I wanted to mainly use my wide-angle lens to photograph more dramatic scenes. I was shooting with my Sony A1 and the 14mm f/1.8, and the conditions kept changing, pushing me to constantly adapt. Same location, completely different results every time. Here’s a rundown of every technique I used along the way. You can also follow along with the full Arizona landscape photography adventure in the video below.
Desert Photography Scouting: The Most Underrated Thing You Can Do
Before I even touched my camera, I spent time just walking around and looking. Scouting is honestly one of the most underrated things you can do as a landscape photographer. In fact, I think it made a huge difference on this desert photography trip.
While walking the area, I was looking for foreground elements. Out here, that meant the incredible cholla cacti scattered everywhere. As you can see in the video above, I also use my phone to pre-visualize compositions before committing to a setup. To plan the sun position, I use PhotoPills. Additionally, I drop pins in Google Maps on anything interesting I find so I can come back when the light is right.
When the light finally hits, you want to be ready to shoot. Otherwise, you’ll spend your best light still trying to figure out where to stand. That’s what scouting gives you, and honestly, it’s the foundation everything else is built on.
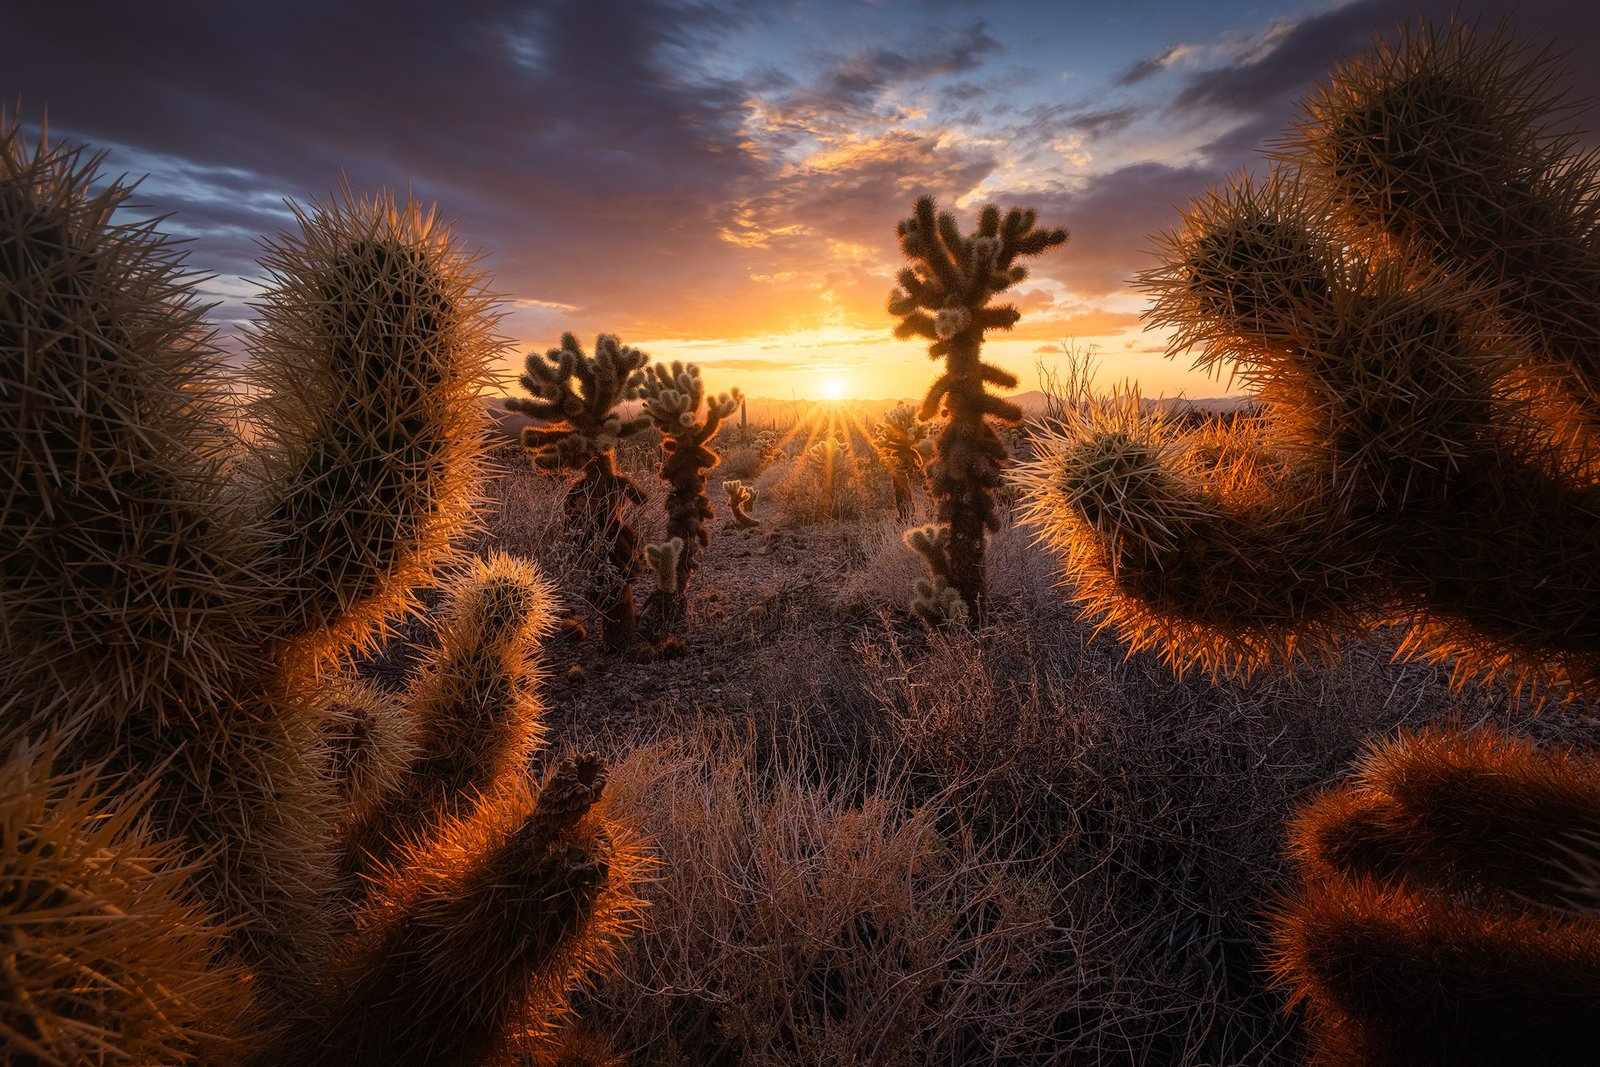
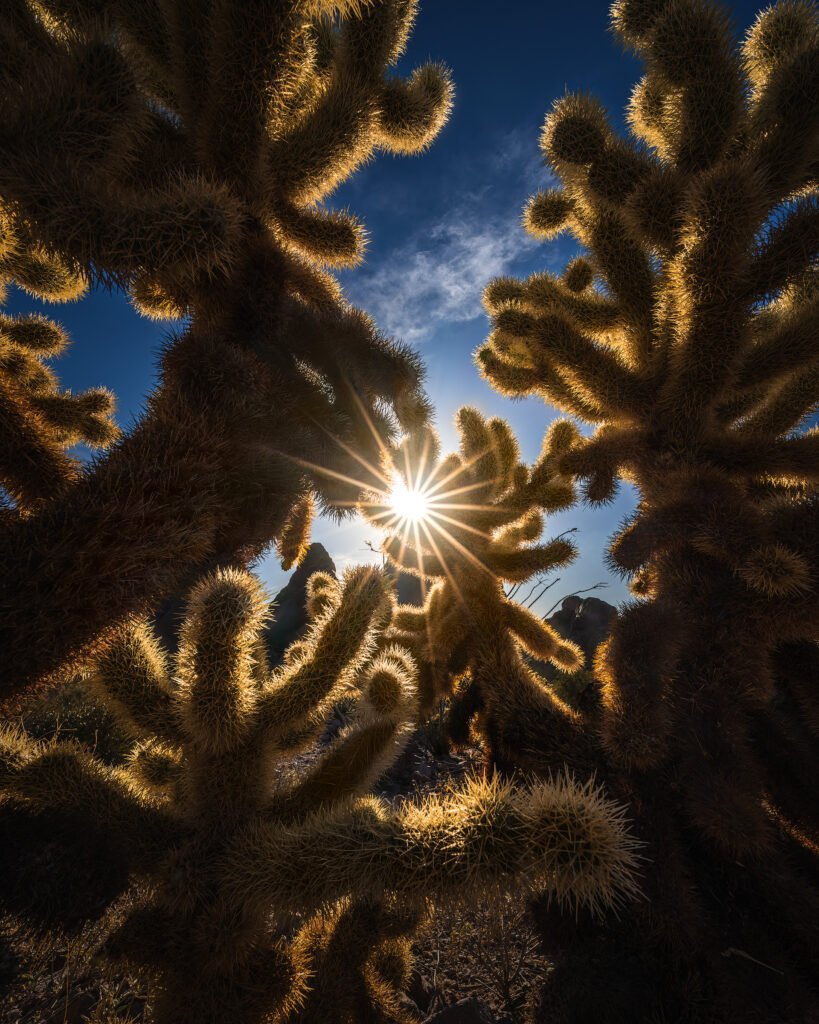
Sun Stars: Stop Down and Let the Aperture Do the Work
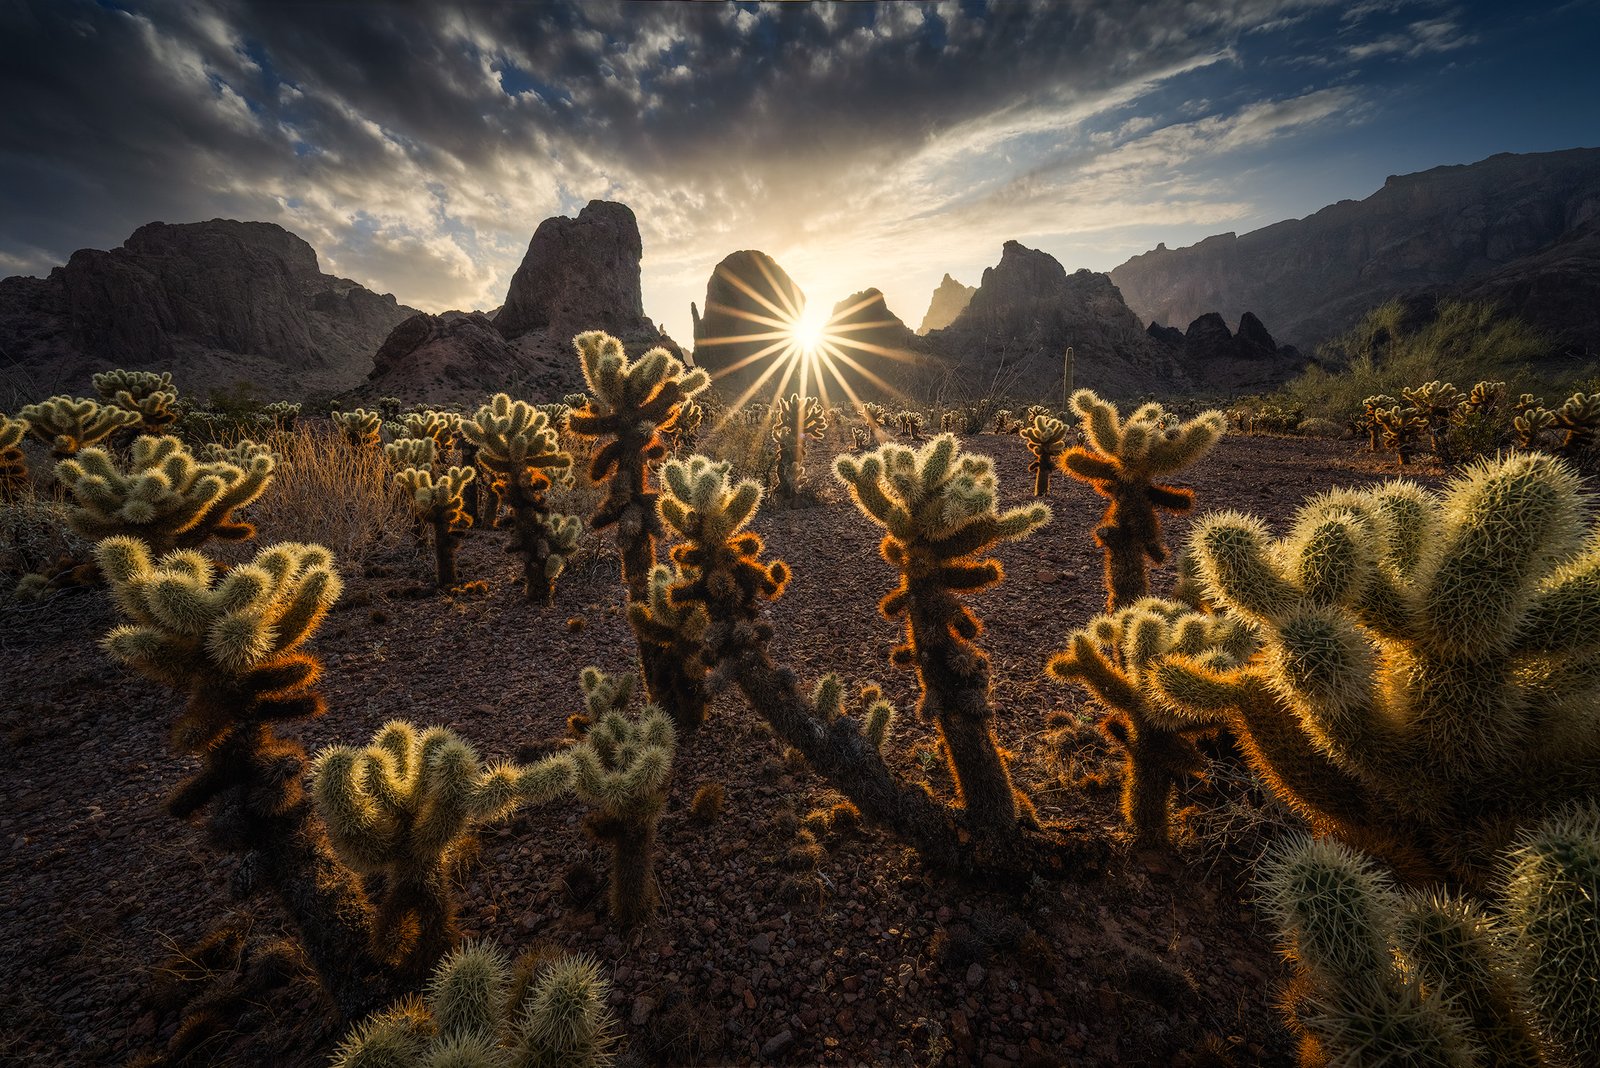
Getting a clean sunstar is one of those things that looks impressive. However, it’s actually pretty simple once you understand what’s going on.
To get a well-defined sunstar in your desert landscape photography, you need to be at f/16 or smaller. The starburst is created by the shape of your aperture blades, so the more you stop down, the more defined the star becomes. Open up to f/5.6, and it’s just gone. Additionally, you want the sun positioned so it’s just peeking over the horizon, a rock edge, or between two cacti. Use it as a truly focal point rather than just something in the frame. It needs to be very intentional, otherwise a sunstar can actually distract from the overall composition.
For focus, a good rule of thumb is to focus about a third of the way into the scene. Combined with f/16, that gets you a lot of depth of field to work with. This sets you up well if you’re not right up against the foreground. From there, you can also use various techniques for hyperfocal distance. If you are closer to your foreground than that, however, you will need to focus stack. We will talk about that shortly.
Exposure Blending: Dealing with Dynamic Range
Shooting toward the sun in the desert means dealing with a massive dynamic range. Your camera usually can’t capture everything in a single frame. As a result, a correctly exposed foreground blows out the sky, or a properly exposed sky darkens the foreground way too much. This is one of the most common challenges in landscape photography, and thankfully, the fix is straightforward.
The solution is exposure bracketing. I shoot multiple frames one stop apart by switching my shutter speed, then blend them using the HDR merge function in Lightroom. Keep your composition locked and shoot the sequence. In post, use the darker frames to control highlights and the brighter frames to pull up foreground detail. It’s pretty straightforward once you’ve done it a few times. For even more precise control, luminosity masks in Photoshop work incredibly well, since they let you blend exposures based on actual tonal values rather than just painting a mask manually.
There’s also a useful extra trick here. If the sun is creating a distracting flare, shoot one extra frame with your hand covering the sun. That gives you a clean foreground with no flare. From there, blend it in as a separate layer in Photoshop. It takes about thirty seconds on location and saves a lot of frustration later.
Focus Stacking: Getting Close & Getting Everything Sharp
This is something you’ll need to do a lot in wide-angle desert photography with close foreground subjects. Even at f/16, you can’t get a cactus one foot away and a mountain range a mile back, both sharp in a single frame. Fortunately, focus stacking solves that.
The idea is simple. You shoot multiple frames focused at different distances, then merge them in post so that everything from front to back is sharp. For a typical landscape photography composition, I’d shoot around five frames depending on the scene. I start at the nearest cactus and work back through the mid-distance cacti to the background. At f/16 each focus point covers a good range, so the frames blend cleanly.
I do my stacking manually, which gives me full control over which distances I’m prioritizing. From there, I use Helicon Focus to merge the stack, then bring everything into Lightroom and Photoshop to combine with the exposure blend.
One thing worth knowing: if your camera has an autofocus stacking mode, you can shoot at a lower f-stop and let the camera determine how many frames it needs. Not only does it take the guesswork out of it, but you also get the benefit of a slightly wider aperture. Just make sure your firmware is up to date, as some cameras need an update to get the best out of that feature.
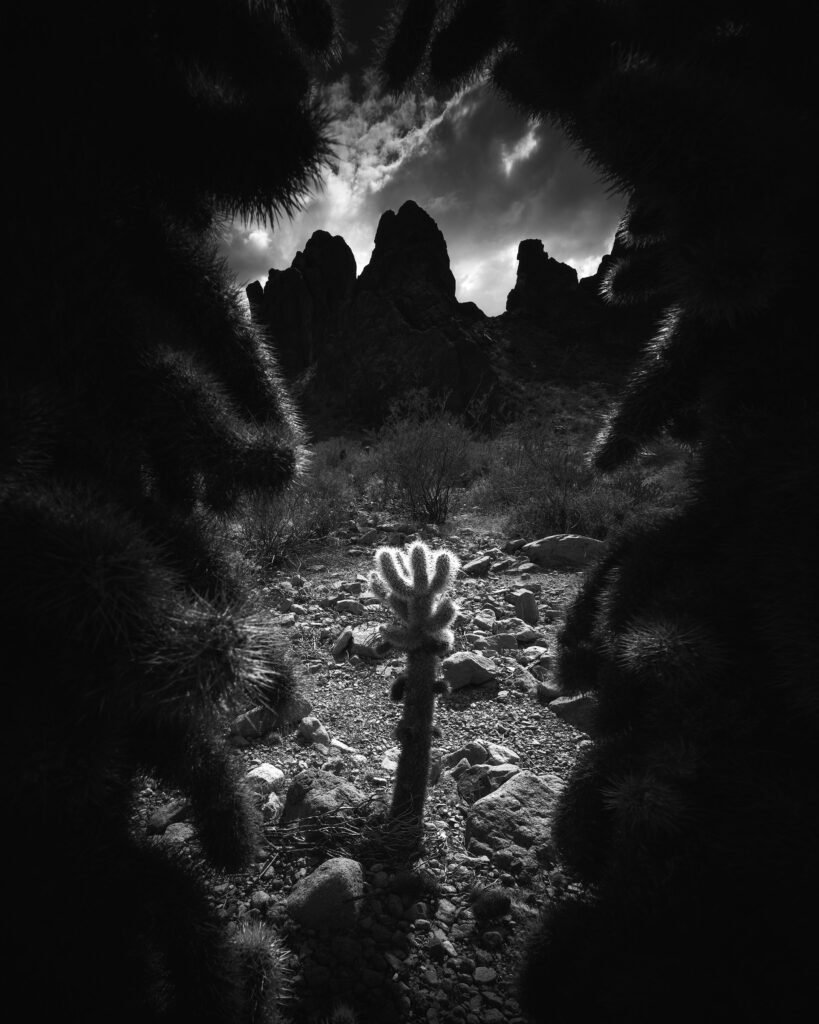
Wide-Angle Lens: Try Getting Closer Than You Think
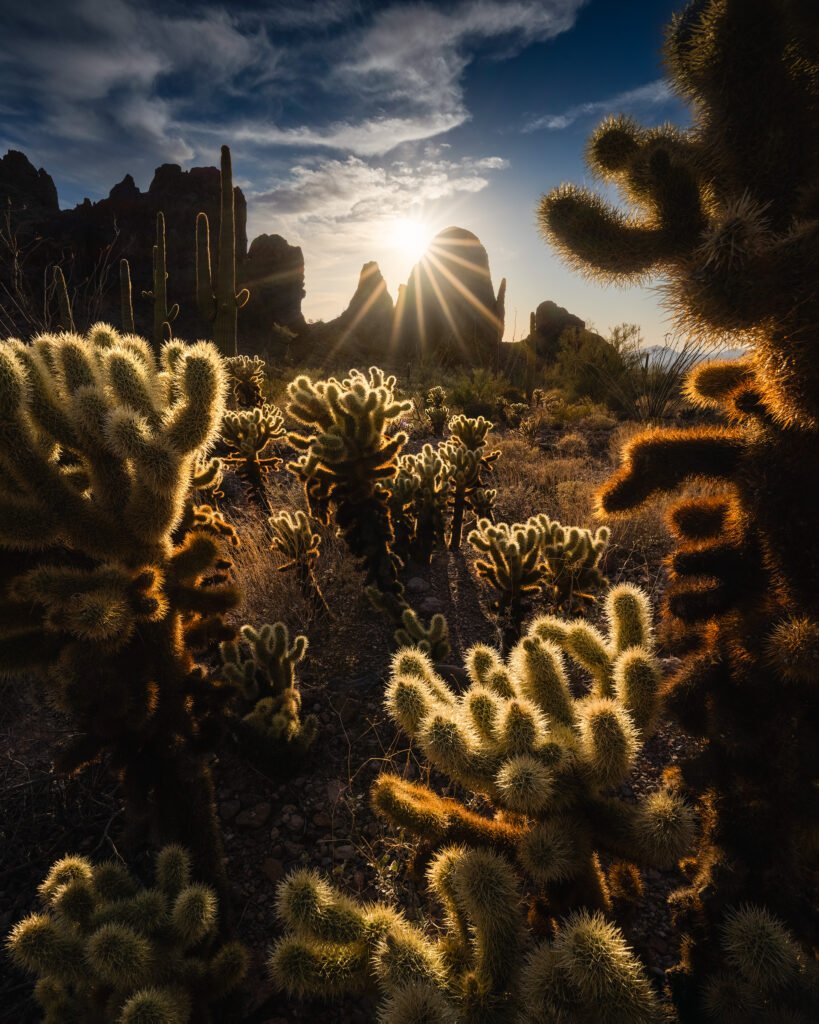
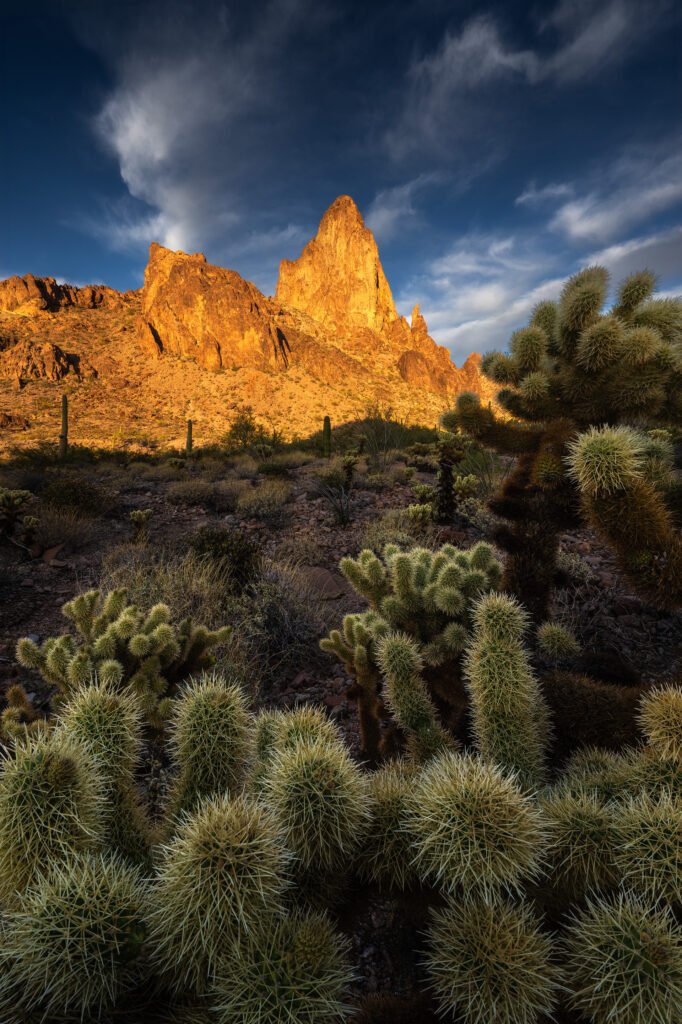
This is honestly where the 14mm gets really fun. Getting physically close to a foreground subject while still capturing everything behind it creates incredible drama. It’s something you simply can’t replicate with a longer focal length. Wide-angle exaggerates the difference in scale between what’s near and what’s far, and when you use that intentionally, it makes for really powerful images.
The mistake I see a lot is photographers standing back and letting the wide-angle do all the work. Instead, push in close and use your foreground elements intentionally. Cacti are perfect for this kind of Arizona photography because you can use them as framing elements, leading lines into the scene, or even fill the frame so completely that the midground becomes less important. Sometimes a weak or distracting midground just disappears when you get low and close enough. That tension between near and far is really what makes desert landscape photography so compelling.
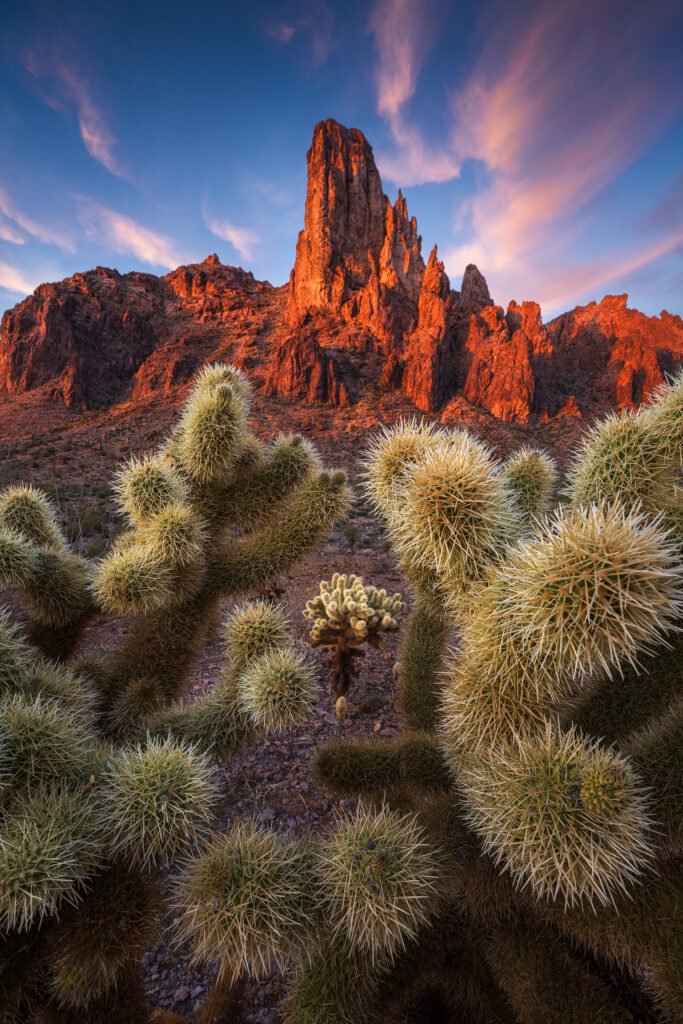
I also think a lot about balance within the frame. On one evening shoot, I had a bright section of rock formation sitting on the upper left, and the image just felt lopsided as a result. Bringing a cactus in from the upper right gave it the counterweight it needed. At 14mm, those balance decisions really matter, because even small shifts in your position create big changes in how everything relates to each other.
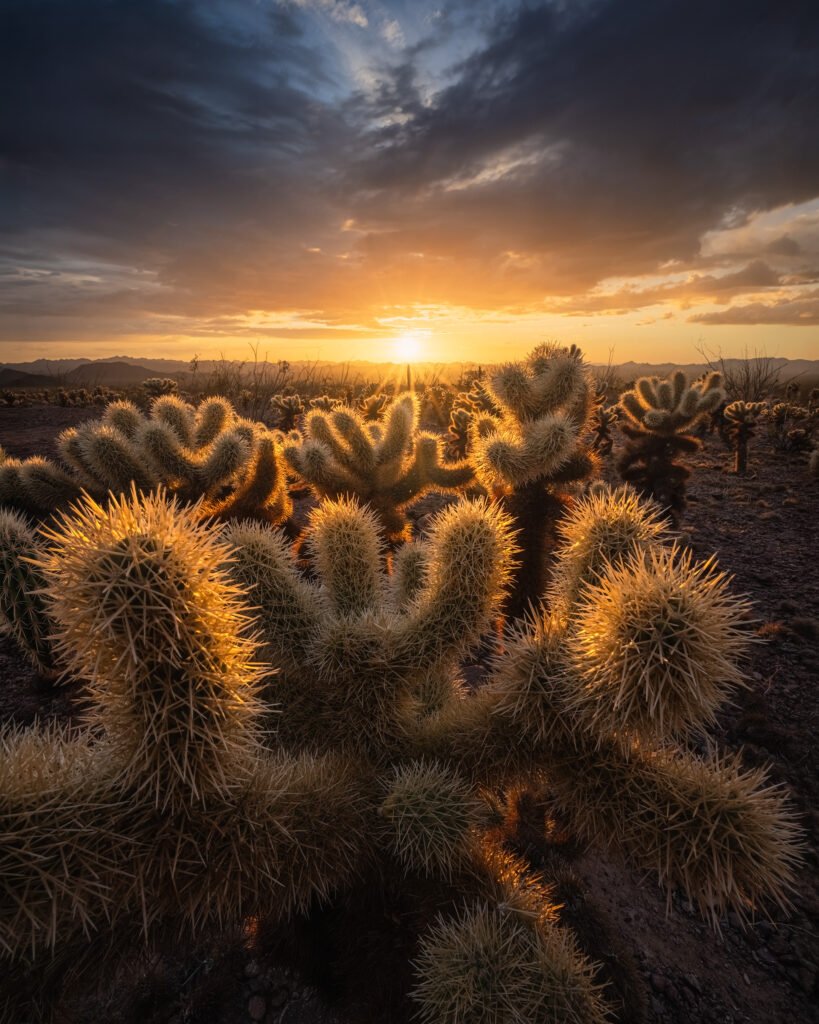
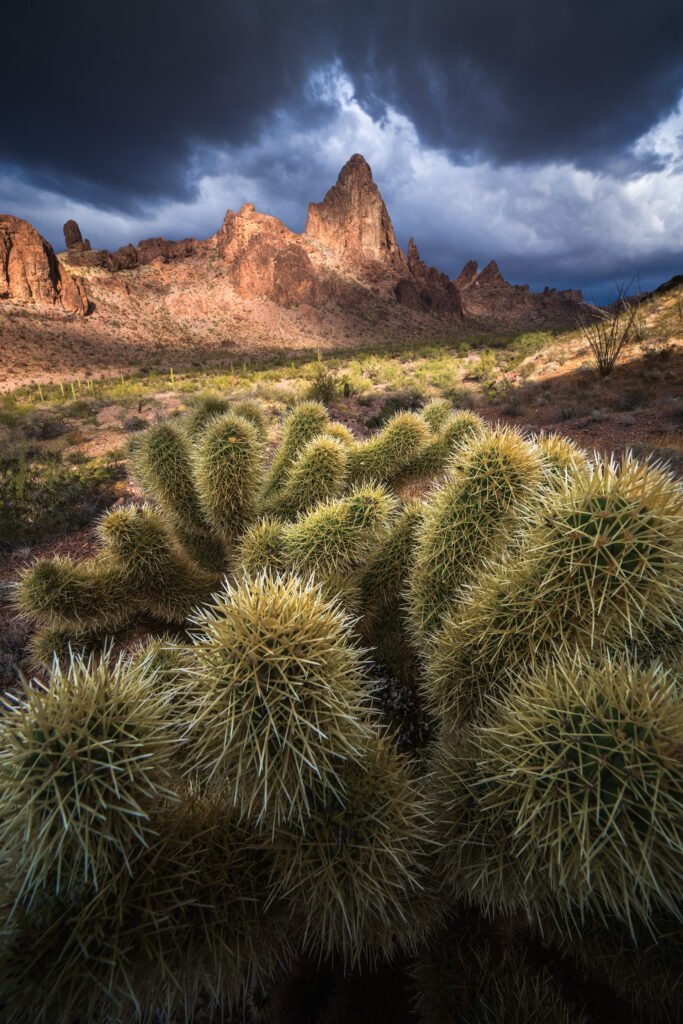
Shooting Beyond Golden Hour: Adapt to What You’ve Got
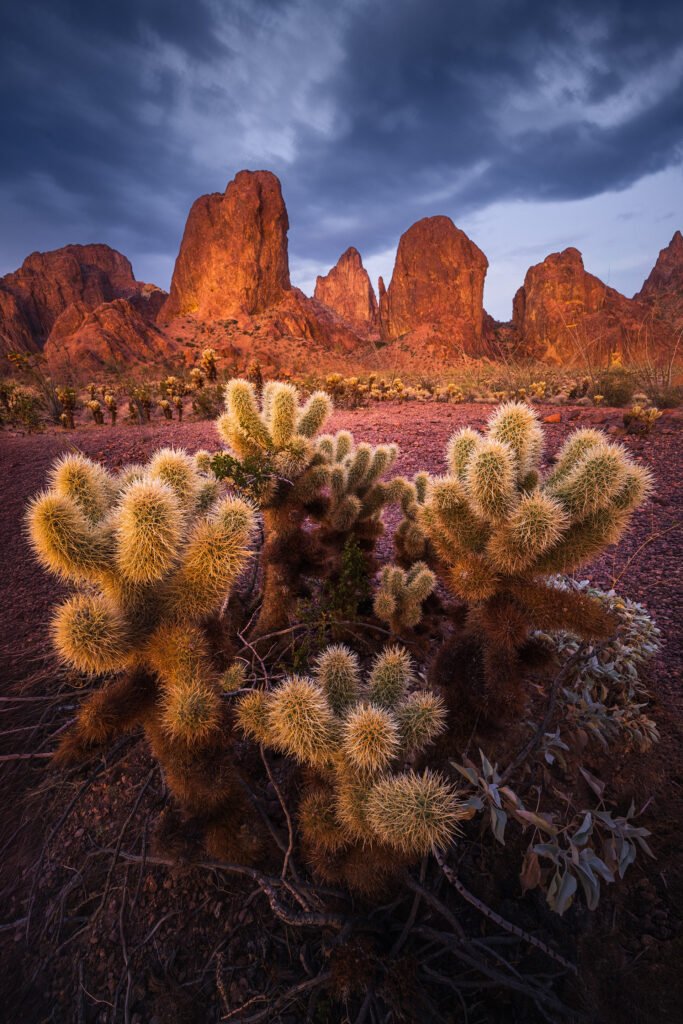
Some of the images I’m most proud of from this Arizona photography trip came nowhere near golden hour. The desert rewards you if you stay out and keep shooting, because the light is constantly changing and each shift gives you something different to work with.
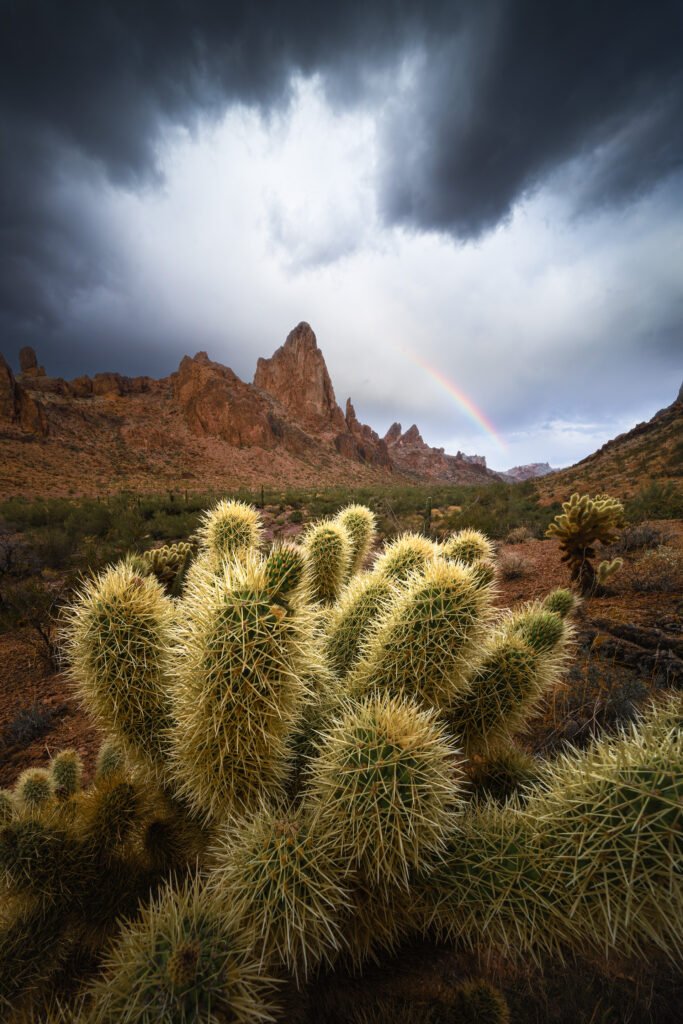
On one stormy afternoon, the clouds rolled in, and the light coming through them was incredible. It had that really contrasty, dramatic quality you get when the sun cuts through dark storm clouds. I pushed in close to the cacti and just waited. A small rainbow then appeared briefly on the horizon. After that, the storm light caught the peaks behind me, and the warm orange glow against those deep blues made for one of the best shots of the whole desert photography trip.
The point is, don’t pack up when conditions aren’t perfect. Instead, pay attention to how the light moves through the day and what it does to the landscape around you. Stay ready, because some of the most interesting desert photography happens in moments you wouldn’t have predicted.
Desert Photography Bonus: Telephoto Tips for Clear Days
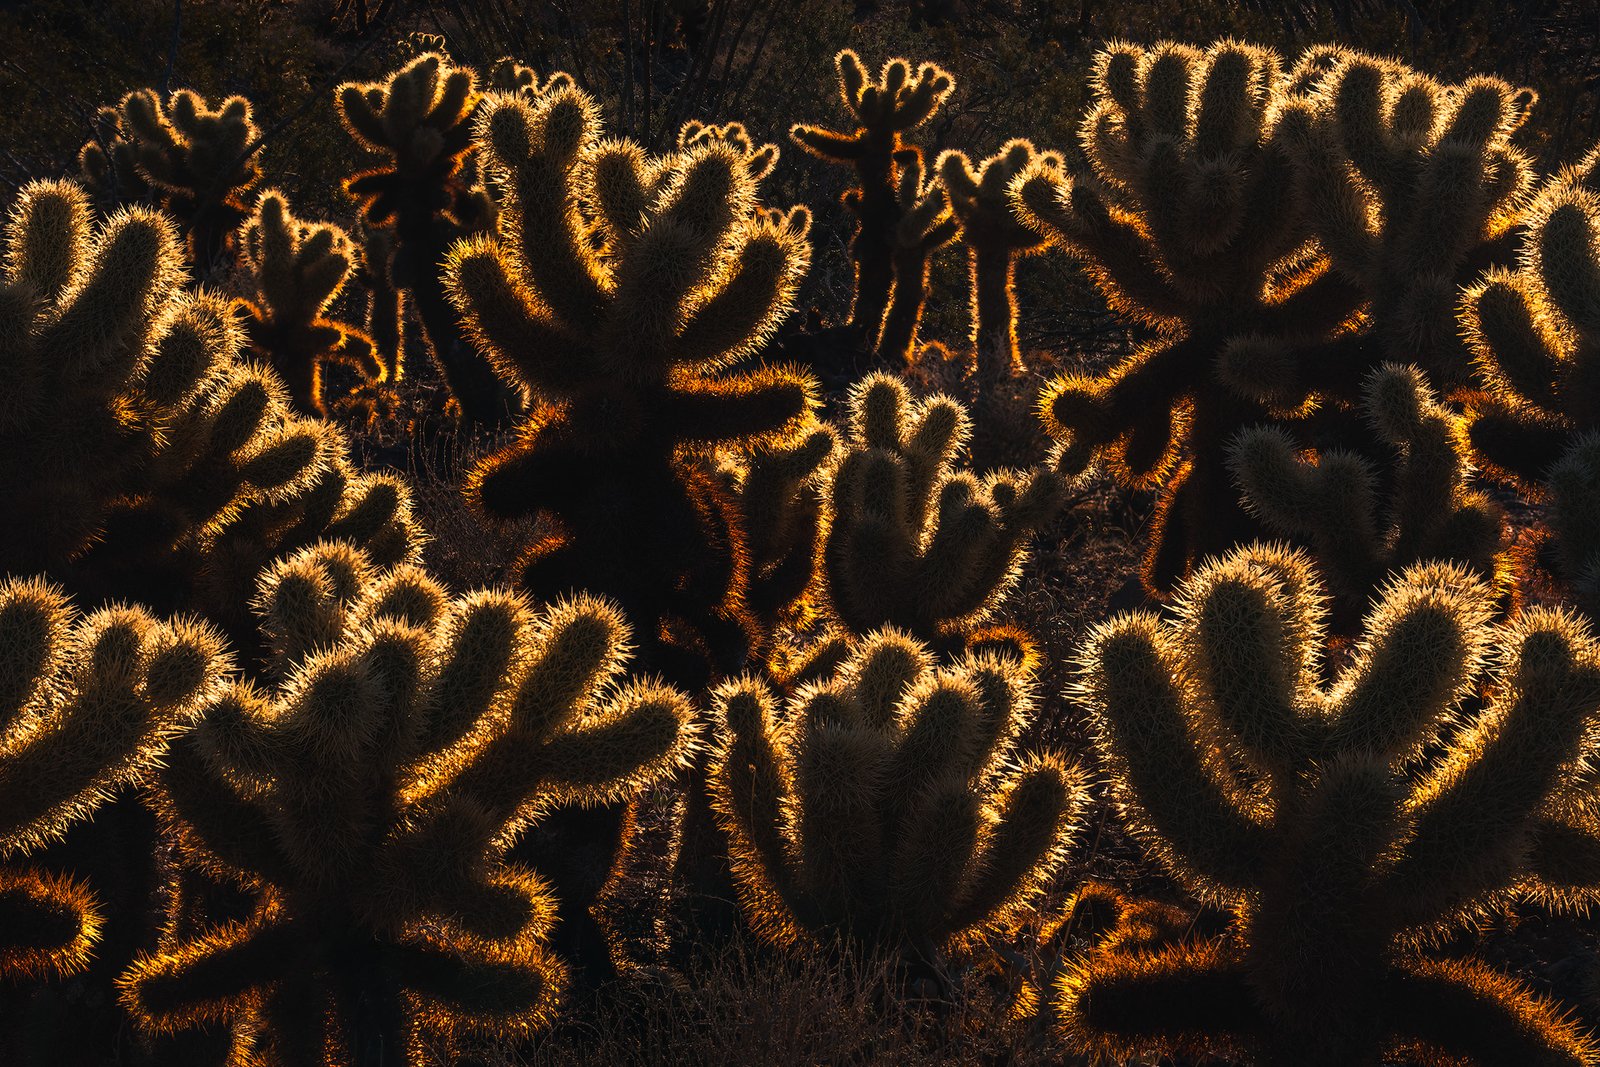
On mornings when the sky is flat and hazy, the best move is often to put the wide-angle away entirely. On one of those mornings during this Arizona photography trip, I switched to the 100-400mm, and it completely changed how I was seeing the location. Rather than trying to make a weak sky work, I simply got rid of it. Instead, I pointed the lens into the landscape itself, looking for backlighting, patterns, and texture in the cacti and rock formations. The telephoto compresses everything into really graphic, almost abstract compositions that feel completely different from wide-angle desert landscape photography.
Focus stacking still applies here too. Since depth of field is even more limited with a telephoto at close distances, I shoot it manually, use a higher f-stop to give myself more range between focus points, and stack in Helicon Focus in post.
Ultimately, every condition the desert throws at you is an opportunity if you’re willing to shift your approach. Clear and hazy is telephoto weather. Dramatic and stormy is wide-angle weather. Everything else is an invitation to experiment.
Wide-Angle Desert Photography: What Made the Difference
Looking back at this Arizona landscape photography trip, the images I’m most proud of really came down to a few consistent habits. Scouting properly meant that when the light hit, I was ready to shoot rather than still figuring out where to stand. Not waiting for perfect conditions made a huge difference, too, because some of the best desert photography frames came on a flat, hazy morning and in the middle of a storm. Staying out and shooting all day meant I was there for moments I never would have predicted, because the light is always doing something if you’re paying attention.
If you want to see all the images and the full process behind them, the video is at the top of the page. And if you’ve got any questions about the techniques, drop them in the comments. Want to learn more about how I capture my photos? Consider joining one of my workshops here!

This was really fun to read – it felt like an unfolding adventure, discovering new shots as the conditions shifted. Thanks for sharing it all!
When shooting multiple brackets for exposure, and multiple focus frames for stacking – how do you do both?
You mentioned “I use Helicon Focus to merge the stack, then bring everything into Lightroom and Photoshop to combine with the exposure blend” – do the focus stacking shots all use a mid-exposure, and then in the blend, it doesn’t ruin the focus sharpness?
Thanks again for the shots and the story behind them all! Fantastic stuff!
Hey Ross, thanks for reading and the questions! For the Focus Stack I do that on a base exposure, generally a little brighter for the foreground, then as I am focused on the background I stop down using my shutter speed for the exposure stack. In Helicon I first stack the raw files, which gives me a DNG I can work with. I then usually stack my HDR in Lightroom and do my post processing, blending the two in Photoshop. Also, while doing post processing I can synchronize the edits across frames. Or sometimes, with varying degrees of success, you can even use the HDR function with the DNG focus stacked file and Lightroom will automatically pick the sharper file to work with on the foreground.
Hi Michael, to continue with Ross’ question, once you have the focus-stacked DNG and the HDR-blended exposure, how exactly do you blend the two? In your response to Ross, you simply state “in Photoshop”. Would you mind elaborating? Thanks.
Hey there
When I said “in Photoshop,” I was just referring to a manual blend using layers and masks. I bring both the focus-stacked DNG and the HDR blend into the same PS document, then blend them together where needed. Usually this is done by separating the sky blend from the focus stacked ground. Photoshop’s sky selection tool can be really helpful for separating things quickly, then I do some manual brushing on a mask to soften the adjustment.
Also, like I mentioned in my reply to Ross, sometimes you can skip Photoshop and just include the focus-stacked DNG in the HDR merge in Lightroom with the single exposure brackets. It doesn’t always work perfectly, but when it does, it’s a solid shortcut avoiding photoshop all together.